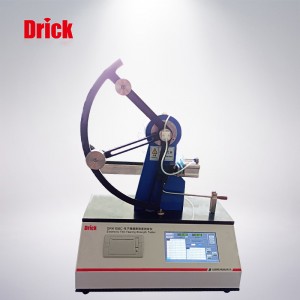
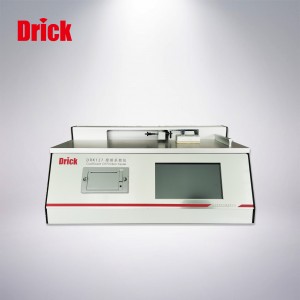
DRK108C Touch Color Screen Electronic Film Tear Tester
DRK108C touch color screen electronic film tear tester (hereinafter referred to as the measuring and control instrument) adopts the latest ARM embedded system, 800X480 large LCD touch control color display, adopts the latest technology, has the characteristics of high precision and high resolution, and simulates microcomputer control. The interface is simple and convenient to operate, which greatly improves the efficiency of the test. Stable performance and complete functions.
Support up to six ranges;
The friction angle can be measured, which can effectively eliminate the influence of friction and reduce the test error;
The high-precision encoder measures the angle, and the tear-resistant digital display is accurate and intuitive;
The average value, maximum value, minimum value and standard deviation of tear resistance can be calculated in groups, which is convenient for customers to process test data;
Manual input of the number of sample layers and sample length, which is convenient for customers to carry out non-standard tests;
The calculation program of the theoretical value of the weight is added to facilitate the inspection of the instrument.
1. Technical indicators
Angle resolution: 0.045
LCD display life: about 100,000 hours
The number of effective touches of the touch screen: about 50,000 times
2. Data storage:
The system can store 511 sets of test data, which are recorded as batch numbers;
Each group of tests can be carried out 10 tests, which is recorded as a number.
3. Implementation standards:
GB/T455, GB/T16578.2, ISO6383.2
Calibration:
Before leaving the factory or after using the testing machine for a period of time, all indicators that have been verified to exceed the standard must be calibrated.
In the <Main Test Interface>, touch the “Calibration” button, and the password input interface will pop up. Enter the password () to enter the <Calibration interface>. (Except for the legal metrology staff, do not enter the calibration state during the use of this system, otherwise the calibration coefficients will be modified at will, which will affect the test results.)
In the <calibration interface>, the encoder line number, gravity acceleration, weight mass, etc. can be set. It can also input the range and pendulum torque of each range, measure the initial angle and the friction calibration angle, and calculate the theoretical value of the weight.
1. Range: direct input;
2. Pendulum moment: input after measurement;
3. Initial angle:
1) The fan-shaped pendulum sags naturally;
2) Clear the angle to 0,
3) Lift the fan-shaped pendulum to the test position;
4) Read the angle and input it.
4. Friction calibration angle:
1) Lift the fan-shaped pendulum to the test position;
2) Click the “Calibration” button;
3) Read the maximum angle, subtract the initial angle, and enter the friction calibration angle as a result.
5. The measured value of the weight: used to compare with the theoretical value of the weight to determine the accuracy of the instrument.
1) Install standard weights;
2) Lift the fan-shaped pendulum to the test position;
3) Click the “Calibrate” button;
4) Automatically calculate the measured value of the weight.
6. Calculation of theoretical value of weight:
1) Install standard weights;
2) Lift the fan-shaped pendulum to the test position;
3) Measure the height of the calibration weight from the test platform, and enter the height before impact;
4) Click the “Calibrate” button;
5) Record the maximum angle;
6) Manually swing the fan-shaped pendulum to the right to the maximum angle, measure the height of the calibration weight from the test platform at this time, and enter the height after impact;
7) Click the “Calculate the theoretical value of the weight” button to automatically calculate the theoretical value of the weight.
Products categories
-

Phone
-

E-mail
-

Whatsapp
-

Top


