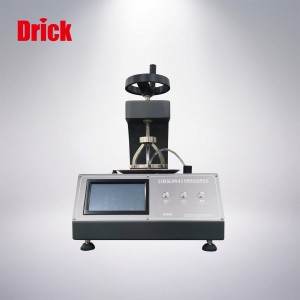
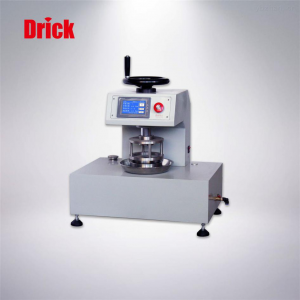
DRK0041 Fabric Water Permeability Tester
The DRK0041 fabric water permeability tester is used to measure the anti-wading properties of medical protective clothing and compact fabrics, such as canvas, tarpaulin, tarpaulin, tent cloth, and rainproof clothing cloth.
Product Description:
The DRK0041 fabric water permeability tester is used to measure the anti-wading properties of medical protective clothing and compact fabrics, such as canvas, tarpaulin, tarpaulin, tent cloth, and rainproof clothing cloth.
Instrument Standard:
Technical requirements for GB19082 medical disposable protective unit 5.4.1 Water impermeability;
GB/T 4744 Textile fabrics_Determination of impermeability hydrostatic pressure test;
GB/T 4744 Textile Waterproof performance testing and evaluation, hydrostatic pressure method and other standards.
Test Principle:
Under standard atmospheric pressure, one side of the test sample is subjected to continuous rising water pressure until water droplets on the surface of the sample seep out. The hydrostatic pressure of the sample is used to indicate the resistance encountered by water through the fabric and record the pressure at this time .
Instrument Features:
1. The housing of the whole machine is made of metal baking varnish. The operating table and some accessories are made of special aluminum profiles. The fixtures are made of stainless steel.
2. The panel adopts imported special aluminum material and metal buttons;
3. The pressure value measurement adopts high-precision pressure sensor and imported regulating valve, the pressurization rate is more stable and the adjustment range is larger.
4. Color touch screen, beautiful and generous: menu-type operation mode, the degree of convenience is comparable to that of a smart phone
5. The core control components use ST’s 32-bit multi-function motherboard;
6. The speed unit can be switched arbitrarily, including kPa/min, mmH20/min, mmHg/min
7. The pressure unit can be switched arbitrarily, including kPa, mmH20, mmHg, etc.
8. The instrument is equipped with a precision level detection device:
9. The instrument adopts a benchtop structure and is designed to be robust and more convenient to move.
Safety:
safety sign:
Before opening the device for use, please read and understand all operating matters.
Emergency power off:
In an emergency state, all power supplies of the equipment can be disconnected. The instrument will be powered off immediately and the test will stop.
Technical specifications:
Clamping method: manual
Measuring range: 0~300kPa(30mH20)/0~100kPa(10mH20)/0~50kPa(5mH20) range is optional;
Resolution: 0.01kPa (1mmH20);
Measurement accuracy: ≤±0.5% F·S;
Test times: ≤99 times, optional delete function;
Test method: pressurization method, constant pressure method and other test methods
Holding time of constant pressure method: 0~99999.9S;
Timing accuracy: ±0.1S;
Sample holder area: 100cm²;
Timing range of total test time: 0~9999.9;
Timing accuracy: ±0.1S;
Pressurizing speed: 0.5~50kPa/min (50~5000mmH20/min) digital arbitrary setting;
Power supply: AC220V, 50Hz, 250W
Dimensions: 470x410x60 mm
Weight: about 25kg
Install:
Unpacking the instrument:
When you receive the equipment, please check whether the wooden box is damaged during transportation; carefully unpack the equipment box, thoroughly check whether the parts are damaged, please report the damage to the carrier or the company Customer service department.
Debugging:
1. After unpacking the equipment, use a soft dry cotton cloth to wipe off the dirt and packaged sawdust from all parts. Place it on a firm bench in the laboratory and connect it to the air source.
2. Before connecting to the power supply, check whether the electrical part is damp or not.
Maintenance and maintenance:
1. The instrument should be placed in a clean and stable foundation.
2. If you find that the instrument is working abnormally, please turn off the power in time to avoid damaging the vitality parts.
3. After the instrument is installed, the shell of the instrument should be grounded reliably, and its grounding resistance should be ≤10.
4. After each test, turn off the power switch and pull the plug of the instrument out of the power socket.
5. At the end of the test, drain the water and wipe it clean.
6. The maximum working pressure of this instrument shall not exceed the range of the sensor.
Troubleshooting:
Failure phenomenon
Cause Analysis
Elimination method
▪ After the plug is correctly inserted; no touch screen display is seen after the power is turned on
▪ The plug is loose or damaged
▪Electrical components are damaged or the wiring of the motherboard is loose (disconnected) or short-circuited
▪Single-chip computer burned out
▪ Reinsert the plug
▪ Rewiring
▪ Ask professionals to check and replace damaged components on the circuit board
▪Replace the microcontroller
▪ Test data error
▪ Sensor failure or damage
▪ Retest
▪ Replace the damaged sensor
Products categories
-

Phone
-

E-mail
-

Whatsapp
-

Top


